What each aid adds to the live view
Peaking and magnification are both display functions. They change how the camera's screen or finder represents the scene before you press the shutter; they change neither the light reaching the sensor nor the resolution of the lens. Sony describes peaking as a function that enhances "the outline of in-focus areas" during Manual Focus or Direct Manual Focus, and describes Focus Magnifier as a way to "check the focus by enlarging the image before shooting."
That difference decides when each one helps. Peaking covers the whole frame at once, so you get a running impression of which edges the camera considers sharp while you turn the ring. Magnification gives up the overview and enlarges one region, which makes a small detail easier to inspect: an eye, a hand on a fretboard, the lettering on a drum head. It is a closer live-view check, not the only aid for judging detail and not an equivalent of the captured file. What fills the screen is still the camera's pre-exposure rendering.
Sony's support article for the ILCE-6700 covers Focus Magnifier and Peaking Display for this body. The help guide pages below give the exact menu paths and option lists.
How they are switched on
On the ILCE-6700 that Sony documents, peaking sits in the Focus menu: MENU → Focus → Peaking Display, where the display itself, its level and its color are separate items. Focus Magnifier sits one level deeper: MENU → Focus → Focus Assistant → Focus Magnifier. Pressing the center of the control wheel enlarges the image, pressing it again changes the magnification scale, and the up, down, left and right positions move the enlarged area. Initial magnification and the time the magnified view stays on screen are separate settings under Focus Assistant.
Sony's ILCE-6700 Focus Magnifier page and Peaking Display page list those items for this model. Peaking Display offers On and Off, Peaking Level offers High, Mid and Low, and Peaking Color offers Red, Yellow, Blue and White. Another camera may put peaking under a Display menu, call magnification "MF Assist", or tie it to the focus ring instead of a button.
Touch double-tapping the monitor to magnify has its own conditions on those pages: it needs Touch Func. in Shooting set to Touch Focus, touch operation enabled, and the focus mode set to Manual Focus, so it is not a gesture that behaves the same way in every AF mode.
The Peaking Display page adds that because the camera itself recognizes which areas are sharp, the effect varies with the subject and the lens, and that the outline is not enhanced on devices connected over HDMI.
The trade-off is coverage against certainty
In low light, choosing between focus peaking and focus magnifier comes down to what the next moment needs: coverage or a closer look. Peaking works at the speed of your hand. You turn the ring, the highlighted edges move, and you can watch the zone of focus travel across a face or an instrument without leaving the composition. What it answers is a broad question — roughly where the camera thinks the sharp edges are — across the entire frame.
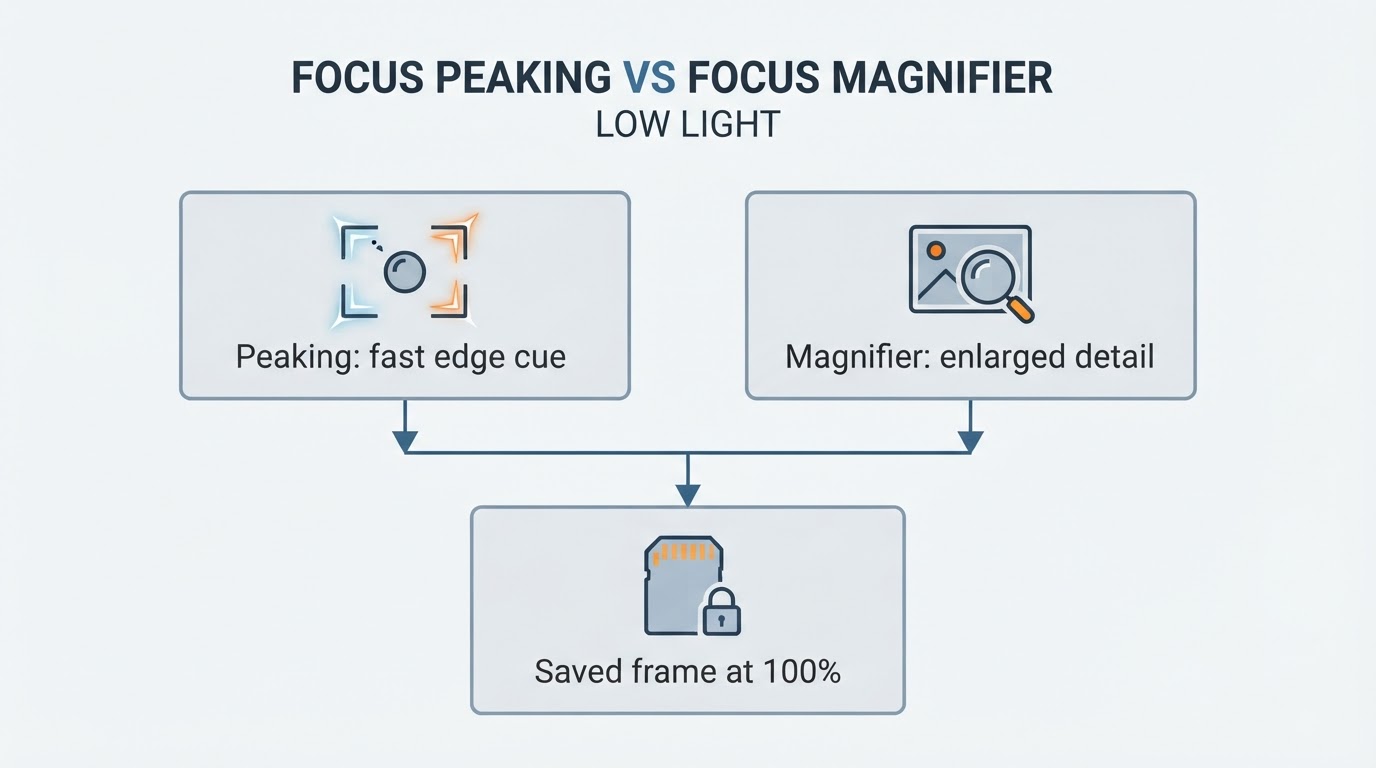
Magnification answers a narrower question: is this specific detail the sharpest point right now? You pay for that with composition. At high magnification most of the frame is gone, so you can no longer see whether the singer's hand left the shot, whether the microphone covers her mouth or whether the horn section drifted into the background. Switching in and out of magnification costs a moment as well, and a dim stage rarely offers spare moments.
Peaking Level is the documented control for how strongly the camera enhances in-focus areas, with three settings: High, Mid and Low. Sony does not present any of the three as a calibrated focus verdict, and since the overlay is the camera's own judgment of sharpness, a brighter outline is not a stricter one. Peaking Color is a contrast choice against the scene in front of you, so the useful one is the one you can actually see under the current lighting, not a universal default.
Matching the aid to the shot
| Focus peaking | Focus magnifier |
|---|---|---|
What it shows | Enhanced outlines over edges the camera judges to be in focus | An enlarged live view of one chosen area |
Best for | Following the plane of focus as you turn the ring while keeping the composition visible | Judging a small, specific detail: eyes, hands, lettering |
Weakness in low light | Fewer and noisier edges, so the overlay can catch the wrong contrast or miss the face | Enlarges noise and softness, and hides the rest of the frame |
What it cannot tell you | Whether the intended detail is sharp in the file | Whether the performer is still in focus at the shutter |
A fast-moving performer in changing light makes peaking the more useful primary cue, with magnification saved for a held note or a pause between songs. A static subject in a dim room, a still life or a building interior on a tripod, rewards the opposite order: magnify the detail that has to be sharp, finish the focus there, then step back out and check the frame. With a long lens and a wide aperture, both aids earn their place — peaking to find the thin zone quickly, magnification to confirm you are inside it.
Very low contrast changes the plan rather than the settings. When nothing on the subject gives the overlay a clean edge, look for a visible detail on the subject that does, such as the lit rim of a cheek or a button, and check it again after you reframe. Borrowing focus from a brighter object at a similar distance, a microphone stand or the lit edge of an instrument, is at best a starting estimate: that object may sit on another plane, and recomposing changes the geometry, so the setting does not simply transfer. Close work at a wide aperture is where the gap between the two matters most.
Why low light weakens both cues
Peaking is drawn from edges the camera recognizes as sharp, so a scene with few clean edges gives it less to work with. Dark clothing, smoke, a black backdrop and a face lit from one side all reduce the contrast the overlay depends on, and sensor noise at a high ISO adds small, restless edges of its own. The result can be over-confidence in one place and blank patches in another: highlights crawling over a noisy jacket, nothing over the cheek you actually care about.
Magnification has the opposite problem. It enlarges the display, and with it the display noise, the slight softness of a lens used wide open and any shake your own hands add. A detail that looked acceptable in the full-frame view can look disappointing once it fills the screen, and that appearance is not a readout of the saved file: the monitor is showing a live feed with its own gain and processing, which is not the same path the exposure takes. Treat a noisy or soft magnified view as a reason to check the frame, not as the verdict on it.
This is where the two aids are most often confused with the finder's diopter. The diopter adjusts the eyepiece to your eyesight so the finder looks crisp, and it has no effect on where the lens is focused. A well-adjusted finder can sit in front of a soft image, and a finder that feels slightly off can sit in front of a sharp file.
Why movement outruns the display
A magnified live view shows the scene shortly before the exposure, and the performer keeps moving through that gap. Focus set on the mouth as the singer leans back can be behind the mouth by the time the shutter opens; at a wide aperture the zone that reads as sharp is thin enough for a small movement to leave it. No display function can show you the blur that has not happened yet.
Peaking has a related limit. The outline describes the instant it was drawn; it does not follow the subject into the exposure. When a performer moves toward or away from the camera, they can step out of the lens's fixed focus plane, and that plane does not travel with them.
A soft saved frame does not identify its own cause. Hand movement that swings the frame, focus sitting slightly in front of or behind the detail, and a subject moving during a slow shutter can produce similar-looking results, and the fix differs: a faster shutter or steadier support for movement, a focus correction for a misplaced plane, or a different aperture for a subject that keeps shifting.
A practical order for a dark venue
Start with peaking on, in a color the stage lighting does not already use everywhere, at a level that leaves the subject readable rather than buried under outline.
Focus broadly with peaking. Turn the ring until the edge that matters, the front of the face or the rim of the instrument, carries the overlay.
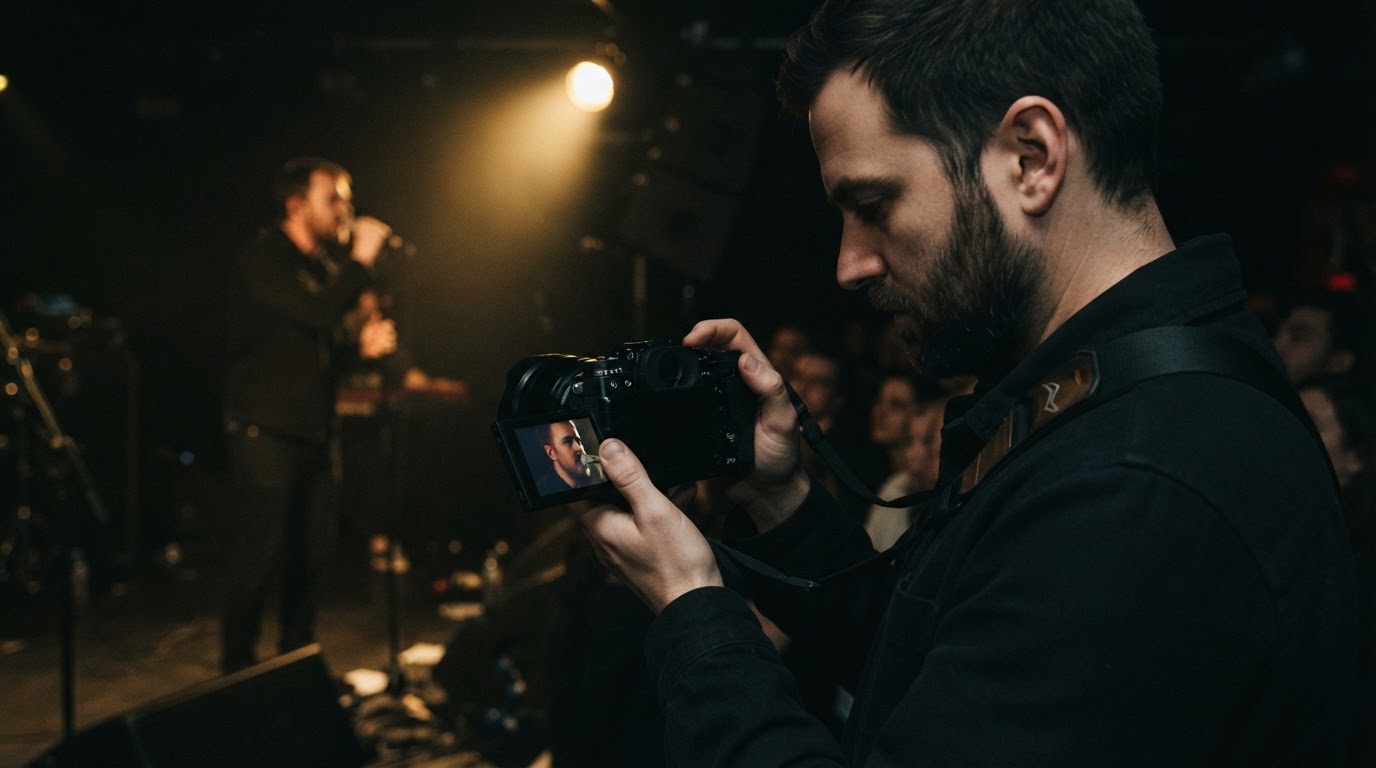
Magnify the detail when the moment allows. For a held note, a pause between songs or a static subject, use Focus Magnifier on the eyes or the hands, finish the focus there, then leave magnification and recompose.
Shoot a short burst rather than a single frame. Several exposures of the same moment give you something to judge instead of something to hope for.
Check the saved frame at 100%, on the detail you intended to be sharp. That step is the only one in the sequence that looks at the actual file.
If the frames keep failing, work through the possibilities in order — focus placement, camera movement, subject movement, then exposure settings that force too slow a shutter or too open an aperture — using the file and its exposure data rather than the overlay.
What these aids are not
Peaking and magnification are display assistance for the moments when you focus by hand or inspect what the camera did. Autofocus tracking works differently. It is designed to follow a subject as it moves, but it is a control loop over a changing scene, not a guarantee that any particular frame holds the eye you wanted; it can lose a face against a dark backdrop or settle behind a hand that crosses the frame. Peaking does not replace that tracking on a moving subject, and Sony's mention of using peaking with autofocus in movie mode describes an overlay on the camera's own focusing, not a manual method.
For the settings side of tracking a performer, the site's guide to concert photography autofocus settings covers the modes and the cases each one suits.
They add nothing to the exposure either. A sharp frame in a dark room still needs enough light for the shutter speed and aperture you can use; the aids help you place focus inside that constraint, not escape it.