What a usable location guide does
A gallery shows people what you saw. A guide tells them how to see it themselves. That distinction should shape every note you take: the useful unit is not "this spot is beautiful" but "stand here, at this time of year, when the light does this, and the frame looks like that."
A complete photography location guide transfers four decisions: where to stand, when the light works, how to get in legally and safely, and what to shoot once you are there. Everything below is organized around producing those four answers, then keeping them current.
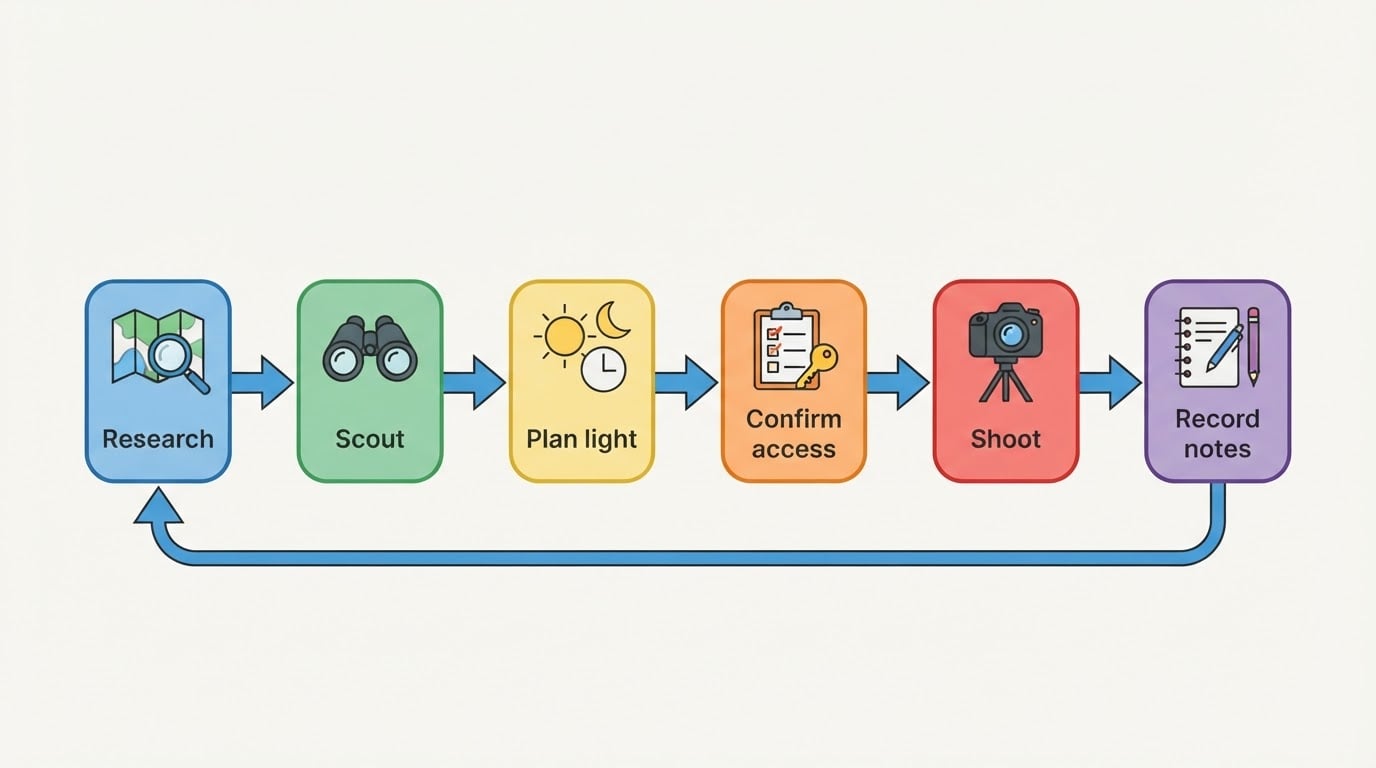
Step 1: Research the location before you leave
Research is desk work, and it saves more time than any piece of gear. Start with the map: satellite and terrain views show the shape of the land, the direction the scene faces, and how far the walk is from where you can legally park. A scene that faces east is a morning subject; one that faces west belongs to the evening. Confirm the orientation with a sun-position app or a compass reading on the map before you commit to an arrival time.
Then look at what has already been made there. Public archives, geotagged photos, and local photographers' portfolios reveal the standard viewpoints and, more usefully, the angles nobody has bothered with. Note the images that feel resolved and ask what position and focal length they imply.
Check the logistics that can cancel a shoot: opening hours for managed sites, seasonal road or trail closures, tide tables for shorelines, and current conditions. These change, so verify them with the managing authority close to your visit rather than trusting a blog post from three years ago.
Write research down as you go. An hour of map work turns into a one-line access note, a time window, and two candidate viewpoints — exactly the raw material the guide needs later.
Step 2: Scout in advance, on foot or virtually
If you can visit before the shoot, scout at the same time of day you plan to photograph. Walk the scene from several positions and find two or three compositions strong enough to build a shoot around. For each one, mark where you stand, not just what you see: the camera position is the part other people cannot guess.
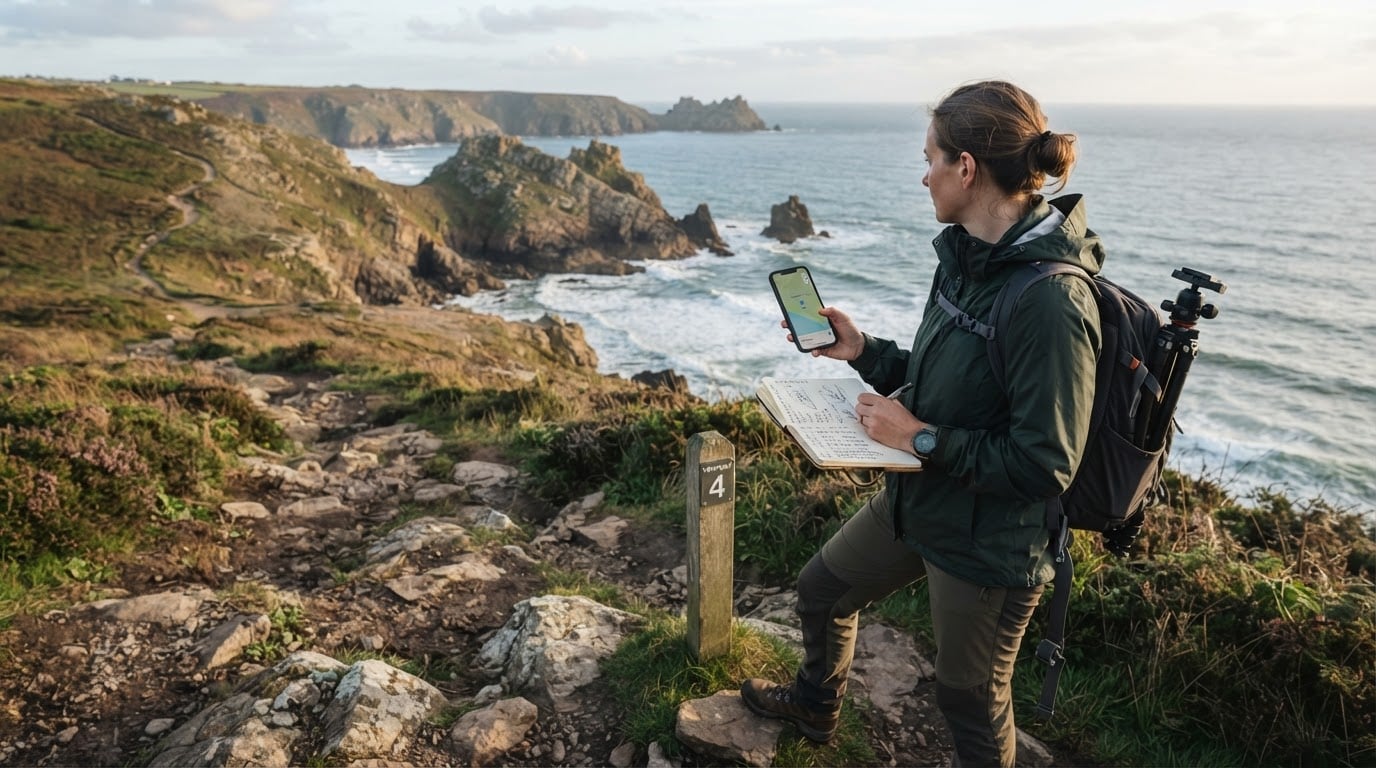
Look for the interruptions before they reach the frame: overhead wires, signage, bins, car parks, and the paths people use. Some can be avoided by moving a few meters; others need a different time of day or a tighter framing. Decide that now, when you are relaxed, rather than at the moment the light peaks.
Safety belongs in the scout record. Check footing, tide timing, exposure to wind or waves, and where a tripod can be set without blocking a path or damaging a surface. A location that is only reachable in good conditions should say so in the guide.
When a personal visit is not possible, scout virtually with satellite imagery, street-level views, and existing photographs, then leave buffer time on shoot day to walk the area before you set up. Treat the first visit as a scouting pass and the second as the shoot.
Step 3: Plan around light and timing
The same location reads as a different subject in the morning and in the evening. Golden hour gives low, directional light and long shadows. Blue hour gives even, cool light and a calmer sky, and it is often the better window for coastal and city scenes that need a clean background. What matters for the guide is which of those windows suits which scene, and where the sun or the dominant light source sits relative to your chosen viewpoint.
Weather is part of the plan, not a reason to cancel it. Overcast light can be excellent for texture and detail that direct sun would blow out. Fog and mist separate layers and simplify busy scenes. Clear skies at dawn frequently deliver the calmest conditions of the day. Build one fallback plan within a short drive of your first choice, and decide in advance what conditions make you switch.
Seasonal change is the most common reason a guide goes stale. Foliage, water levels, snow lines, and vegetation growth all alter what the frame contains across the year. Note the date of every visit and the conditions that were specific to it, so a return in another month is planned rather than guessed.
Work backwards from the light. If the strongest window is brief, arrive early enough to be set up, focused, and waiting. Setup is not part of the shoot; it is the price of being ready for it.
Step 4: Handle access and permissions before you shoot
Access is the part of the guide that saves other people the most trouble, and it is the part most guides leave out. Identify who manages the land — a parks department, a conservation trust, a private owner, a historic property, or a coastal authority — and check the current rules with that manager.
Rules differ by site type and by use. Personal photography and commercial photography are often treated as different activities, so if the images will serve a client, a product, or advertising, say so when you ask and get any permission in writing. Where a permit or fee applies, record what was required, who granted it, and the terms that came with it.
Confirm the practical details: where you may park, whether you may leave a vehicle overnight, group-size limits, drone restrictions, and any areas closed for restoration or safety. Drone rules are usually set by the aviation authority as well as the land manager, so check both.
Leave the site as you found it. Stay on established surfaces where required, cross fences only where allowed, and keep clear of wildlife and nesting areas. A guide that documents the rules protects the location as much as it helps the next photographer.
Step 5: Build a shot list that follows the light
A shot list is a plan for decisions, not a script. Order it by the light rather than by preference, because the light will not wait for you to finish a frame. For each shot, record the subject, the camera position, the focal length you intend to use, and the time window it depends on.
Shot | Position | Intended look | Best window |
|---|---|---|---|
Wide establishing frame | North end of the path | Full scene with a foreground anchor | Final light before sunset |
Compressed layers | Raised viewpoint | Flattened distance, separated ridges | Early golden hour |
Detail study | Close to the subject | Texture in soft side light | Overcast or late light |
Focal length deserves a deliberate choice rather than a default. Wide lenses pull foreground and distance together and exaggerate the space around your subject; telephoto lenses compress distance, stacking layers and simplifying the composition. Decide which of those the scene wants, then move your feet until the relationship between the elements is right.
Leave room in the list for what you find. The most useful frame is often the one you planned least and noticed because you were standing somewhere deliberate. When the light turns, shoot the list in order of the windows that are closing first.
Step 6: Turn field notes into a reusable guide
Take notes in the field while you shoot, not afterwards. Record the actual time of each frame, the direction of the light, what the weather was doing, and anything that nearly went wrong. A few lines on a phone or in a small notebook is enough; the notes only need to make sense to the person planning the next visit.
Back at the desk, assemble the guide around decisions rather than experience:
- Location basics: name, coordinates or a precise pin, and the nearest legal parking.
- Conditions: date of visit, time window, weather, and light direction.
- Viewpoints: two or three marked positions, each with a sample frame so the framing is unambiguous.
- Access: who manages the site, what you verified, and any permission or fee that applied.
- Gear and settings: what you used and why, including the focal length and any filter that earned its place.
- Results and changes: what worked, what did not, and what to try next season.
Write the guide to a completion standard: a competent photographer who has never been there should be able to read it and repeat the shoot without asking you questions. If they can, the guide is finished. If they cannot, the missing detail is usually a position, a time, or a rule — add it and republish.
Keep the guide beside the photographs rather than in a separate folder, update it after every visit, and date the revision. A guide is a living record; the version from two winters ago is not a guide, it is a rumor.
An example of the format in practice
Chris Sidoruk Media publishes photography location guides that pair technique with place: write-ups on how to scout a location with maps and light, on golden-hour versus blue-hour timing, on focal-length choice, and on composition, alongside a locations hub that documents destinations such as Nubble Lighthouse in York, Maine, Mount Greylock in the Berkshires, and Silver Sands State Park in Milford, Connecticut, with notes on light and atmosphere. The pattern worth borrowing is the pairing itself — the technique explains the decision, and the location entry records the conditions — so a reader can plan a return visit instead of only admiring someone else's morning.
Common mistakes that make a guide useless
The most frequent failure is a guide that names a location without a time window: the reader arrives, the light is wrong, and the place looks nothing like the pictures. The second is missing access notes, which turn a promising return visit into a wasted drive. The third is treating one visit as the final word; seasons, closures, and conditions change, and a guide that never gets updated quietly becomes wrong.
Avoid over-planning, too. A shot list that leaves no room for the unexpected turns a shoot into an execution exercise. The best guides are specific about positions and timing and loose about everything else.
Start with your next location
Choose a location you already want to shoot, do the desk research, scout it once, and write the notes down in the structure above. The first guide will be rough; the second will take half the time. Over a season, those notes become the most useful photography asset you own — a record of how to return to a place and get the picture again, in light you can predict rather than hope for.