Why concert files resist the usual edit order
Stage lighting is mixed, colored and always moving, so one frame can hold three or four color temperatures at once. That is a capture problem as much as an editing one — this article stays on the editing side. If your files are noisy or soft before the Develop module opens, no slider rebuilds detail that was never recorded.
The goal is not a dramatic look. It is a file that reads clearly: believable color, controlled highlights, tolerable noise and skin that still looks like skin. Each stage below ends with a stopping condition.
The order of operations
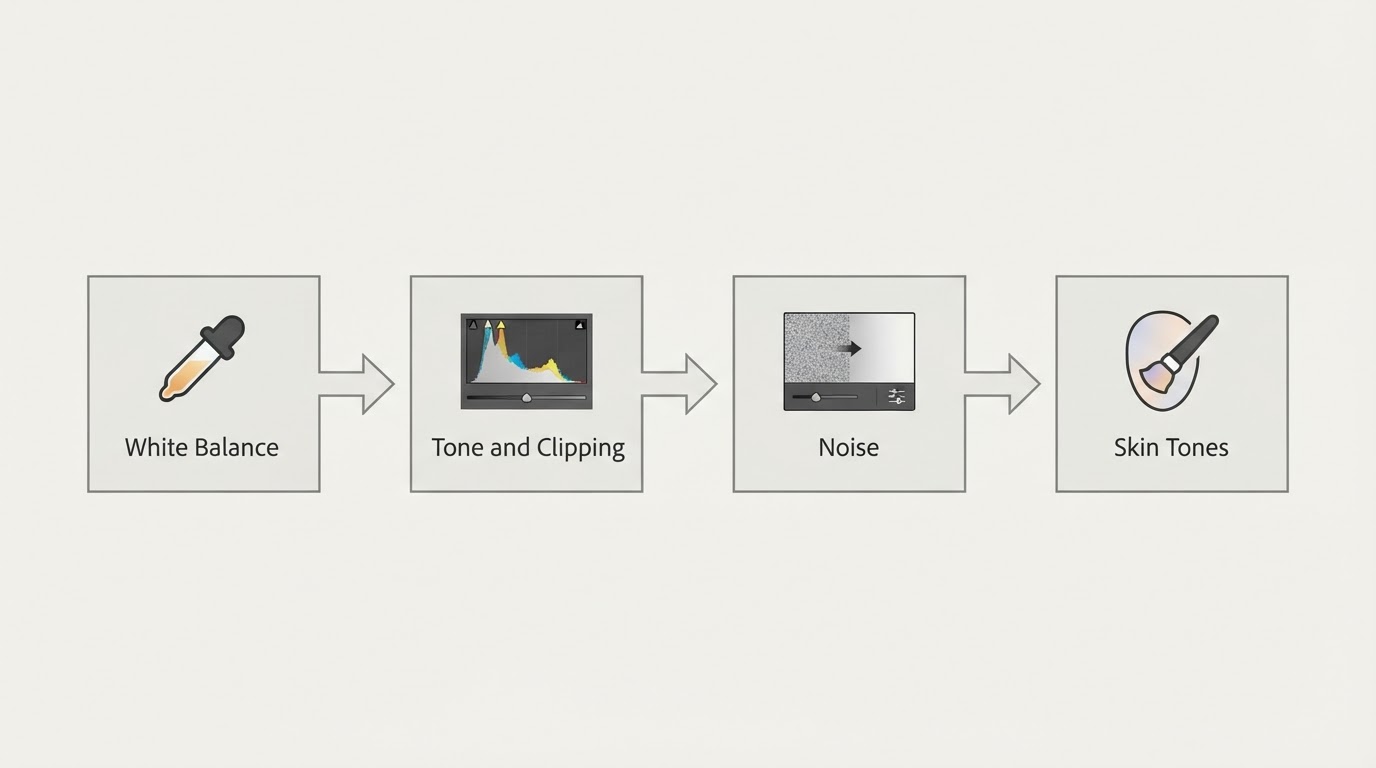
Work top-down and finish one stage before starting the next; skipping ahead usually means redoing work.
1. Correct the color cast before anything else
Open the Basic panel and look at the temperature and tint sliders. Under mixed stage light they are usually fighting each other: a magenta wash from one side and a green or amber wash from the other leave skin in a color that no exposure setting can fix.
Use the white balance eyedropper on a reference that should be neutral — a grey speaker grille, drum hardware, or a white shirt lit by the same source as the performer. A full correction can flatten the atmosphere of a show; a partial correction that keeps some stage color is often the better editorial choice. Make that a deliberate decision, not one you compensate for later.
2. Set tone, then test the highlight limits
Once the color is stable, use the tone controls in Adobe's Lightroom Classic and Camera Raw guide for what each slider owns: Exposure drives midtone brightness, Highlights works the upper range, Shadows the lower range, and Whites and Blacks set the clipping points. Adobe recommends a top-down pass rather than adjusting sliders at random.
The limitation sits here. The Highlights slider redistributes values in the upper range, so it can reveal detail that is present but compressed. It cannot reconstruct data that was never recorded. If a channel was clipped at capture — the red channel under a red spotlight is the classic case — the value is already at maximum, and Highlights only shifts numbers around that dead ceiling. Watch the clipping indicators; when a channel is pinned at the top, protect the rest of the frame instead of pushing saturation to compensate.
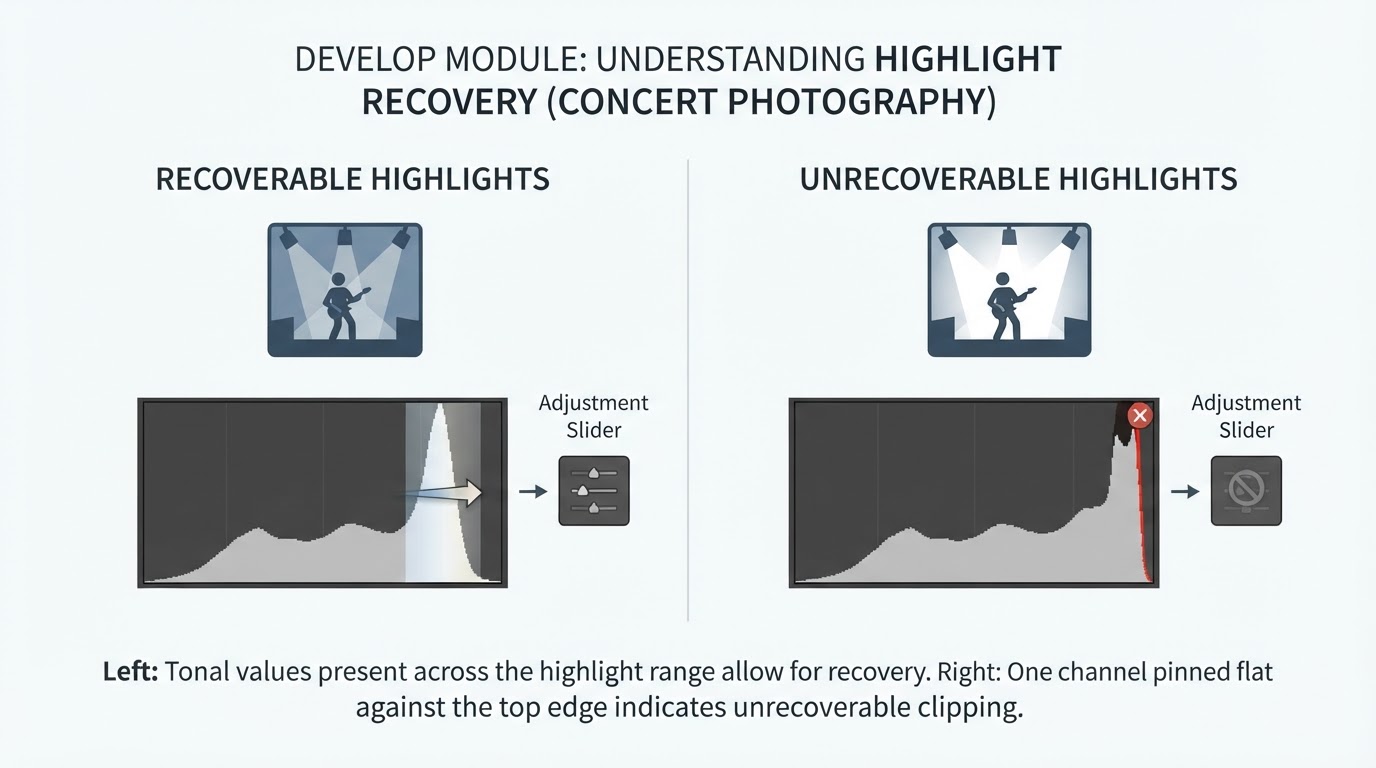
- Lower Exposure or Highlights when the histogram spikes at the right edge.
- Leave the spike alone when the surrounding values still hold the shape you want.
- Use Whites and Blacks to set both clipping points deliberately.
3. Treat noise at 100% zoom
Zoom to 100% before touching the Detail panel. Noise that disappears at fit-to-screen may be invisible at the final display size, and every noise adjustment costs some real texture.
Start with color noise if you see blotchy magenta and green patches in the shadows; it removes more easily without visible cost. Then work on luminance noise, where the trade is real. Lightroom separates luminance amount, detail and contrast: raise the amount until the grain softens, then pull it back until skin and fabric texture returns.
Stop when the image starts to look plastic: waxy skin, smeared hair, a jacket turning into a soft blob. A cleaner file needs less correction.
4. Protect skin tones last
Saturated stage light does its worst damage to skin. After the tone and noise work, check the face again at 100%. If skin drifts orange, red or green, fix it locally rather than with a global saturation cut.
Use a local face mask to adjust saturation, temperature or tint gently; the global Color Mixer affects other parts of the frame too. A face that matches the stage is not a mistake, but a face that reads as a different light source is. Skin should still show texture and highlight variation, not a flat colored patch.
Diagnostic matrix
What you see | Check first | Restrained action | Stop when |
|---|---|---|---|
Orange or magenta skin under a colored wash | White balance and tint | Correct partly with the eyedropper on a neutral reference | Stage color still reads, skin no longer fights it |
Red channel pinned in the brightest highlights | Clipping indicator | Lower Highlights or Exposure, not saturation | The clipped area stops dominating the frame |
Blotchy magenta and green patches in shadows | 100% zoom on the darkest area | Color noise reduction, then a light luminance pass | Patches smooth out without losing texture |
Grain across the whole frame | 100% view and file format | Luminance noise reduction; accept some grain | Texture returns when you back off |
Skin looks gray after color correction | Local mask over the face | Small local temperature and saturation adjustment | Skin matches the scene's light but keeps warmth |
Limitations worth accepting
Three limits are worth accepting rather than fighting.
First, clipped data cannot be recovered. Once a channel reaches its maximum, that information was never stored, and no slider can bring it back.
Second, noise reduction always trades detail for smoothness. No setting removes grain while preserving every texture; pick the setting you can live with at the size the image will be used.
Third, no preset replaces judgment. One built on someone else's lighting will misfire on yours.
Before export, run a completion check: look at the darkest shadow, the brightest highlight and the face at 100%, and ask whether the image reads the way the show felt. If you cannot see a clear improvement without a new artifact, back off the last adjustment.
If noise and clipped highlights recur often enough that editing feels like damage control, the fix may belong at the capture stage. Start with the site's concert photography tips for the in-camera choices that affect the file you bring into Lightroom.
FAQ
Can Lightroom recover blown-out highlights in concert photos?
Only where data still exists. The Highlights slider can bring out detail that was recorded but compressed into the upper range. If a channel was clipped at capture, the value is already at its maximum and nothing is left to recover — the edit can only lower the surrounding brightness so the clipped area stops dominating the frame.
Should I fix the color cast before or after noise reduction?
Fix the color cast first. White balance changes how noise reads, and correcting color afterwards means re-evaluating the noise work on a different image. The order that holds up is white balance, tone, noise, then skin tones, each stage finished before the next begins.
How much noise reduction is too much?
When texture starts to disappear. Raise the luminance amount until the grain softens, then back it off until skin, hair and fabric regain their surface. If a face looks waxy at 100%, you have gone too far.